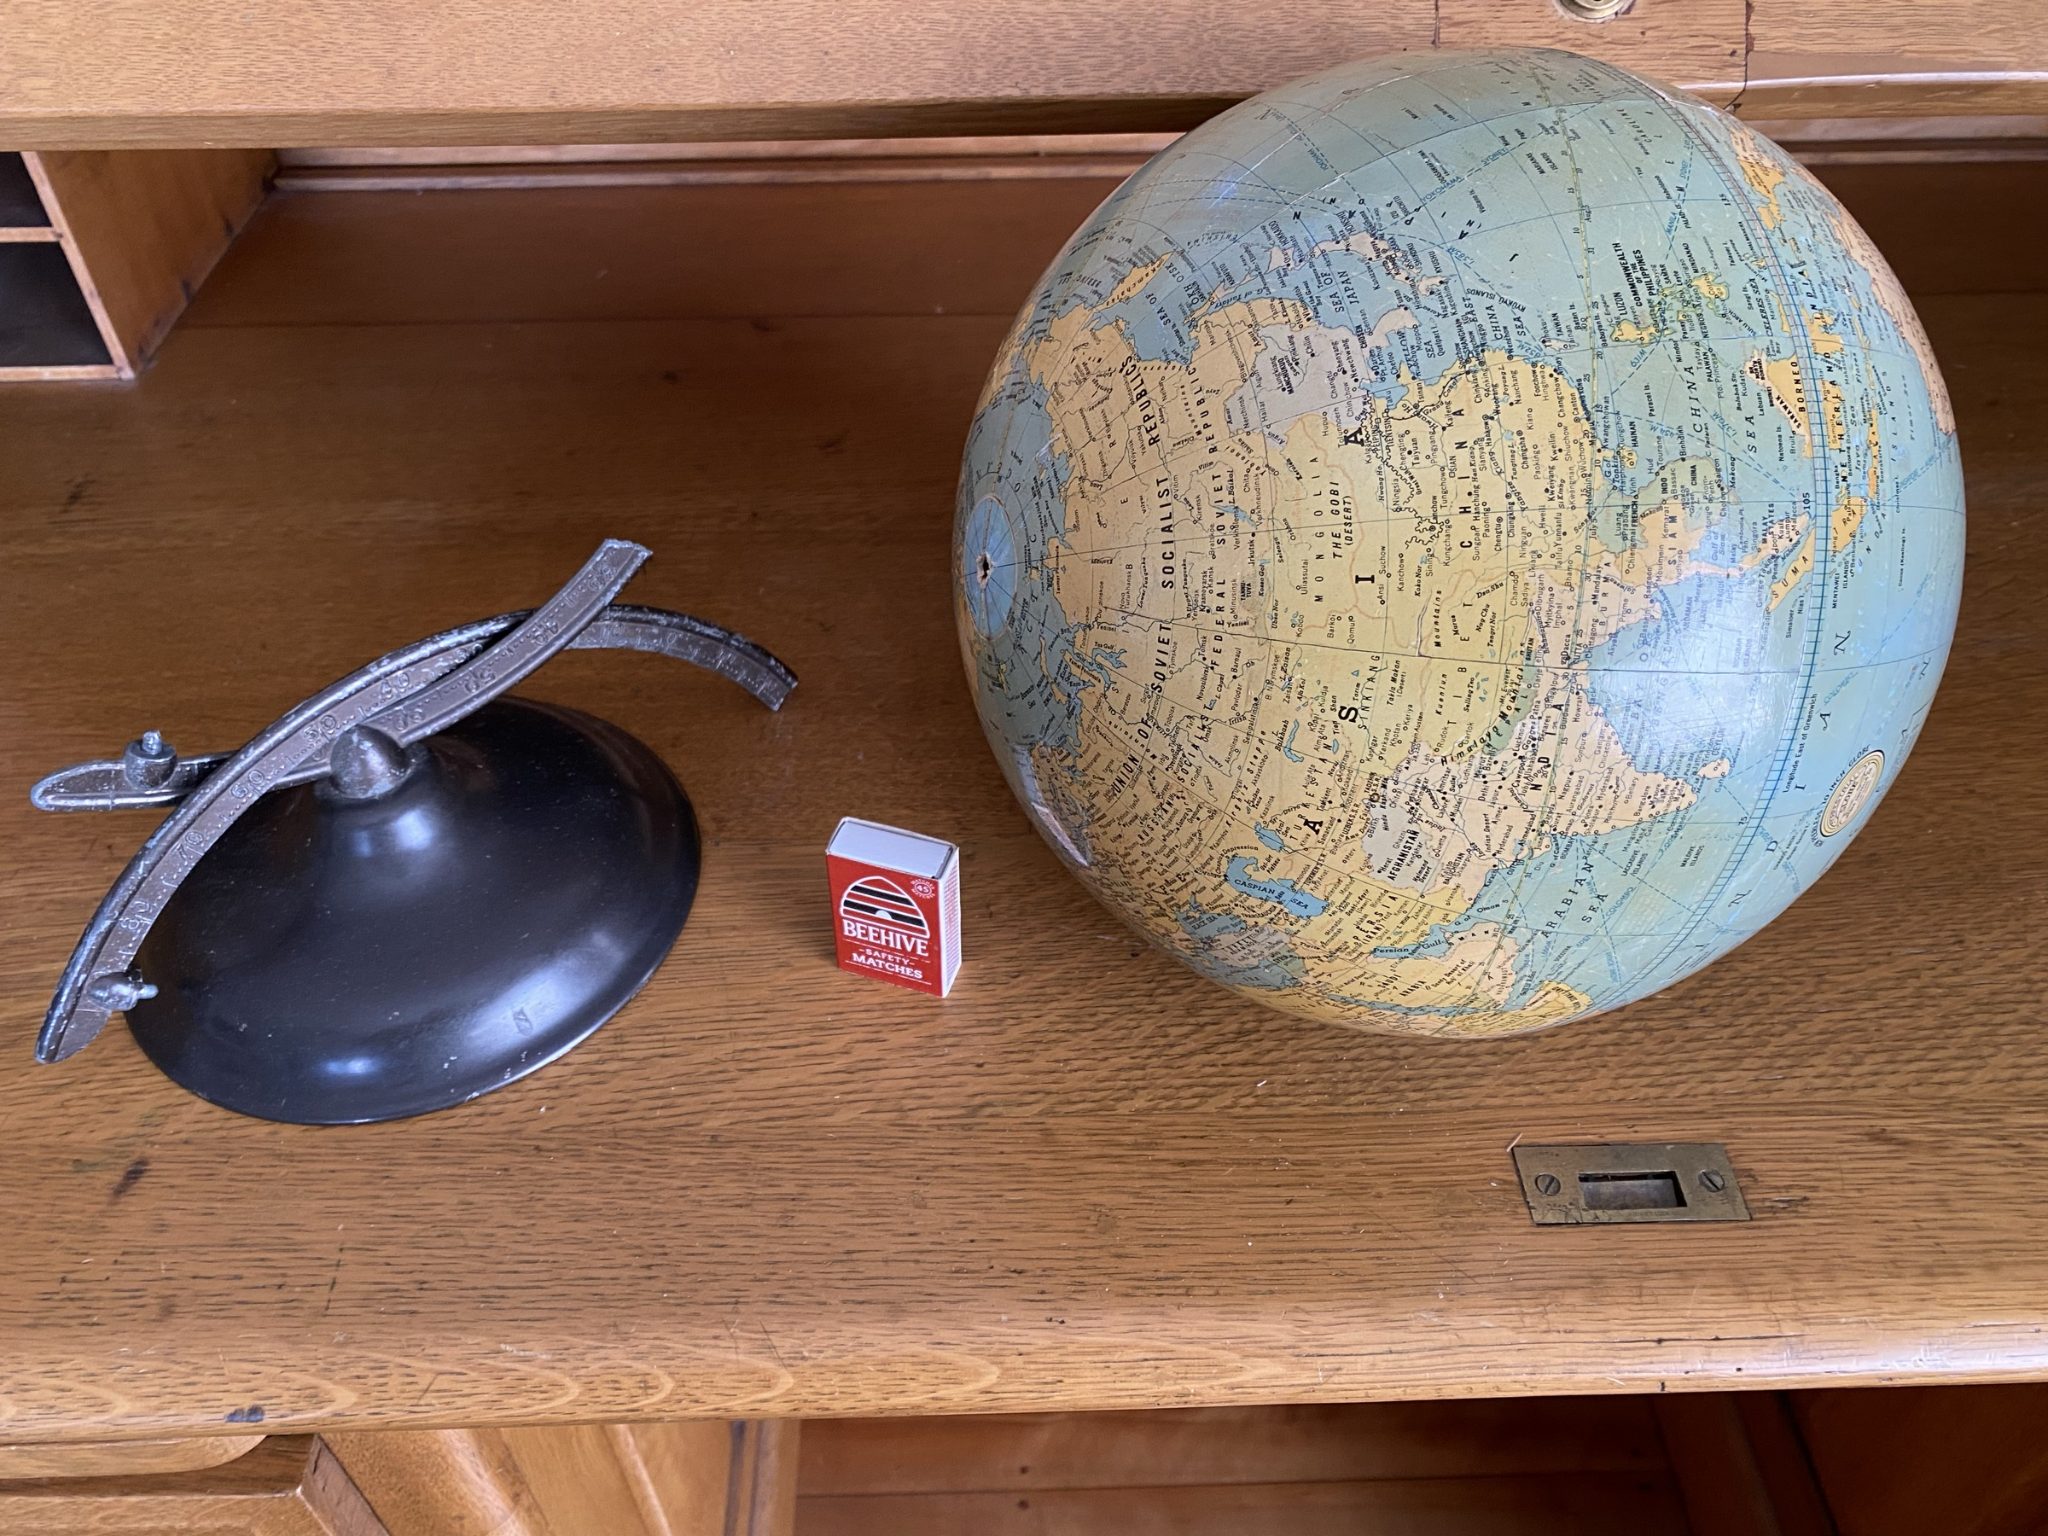
In February 2025, I bought an old Weber Costello peerless 10-inch globe at an auction web site. The metal stand was broken, as shown in the following pictures. Given the break, the globe was inexpensive. (Click on any image to enlarge.)
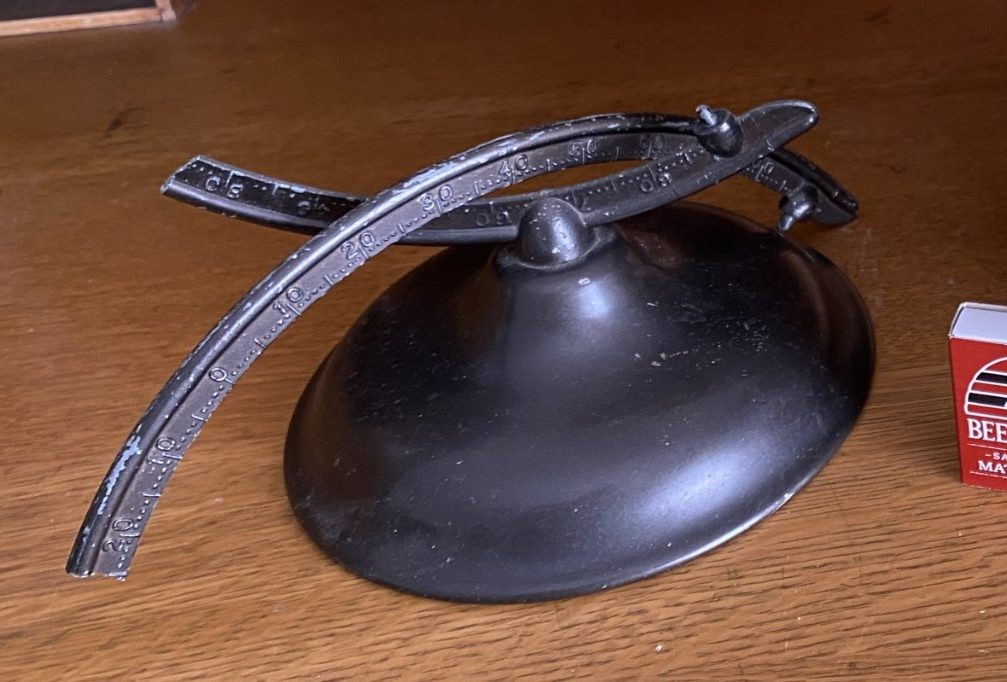
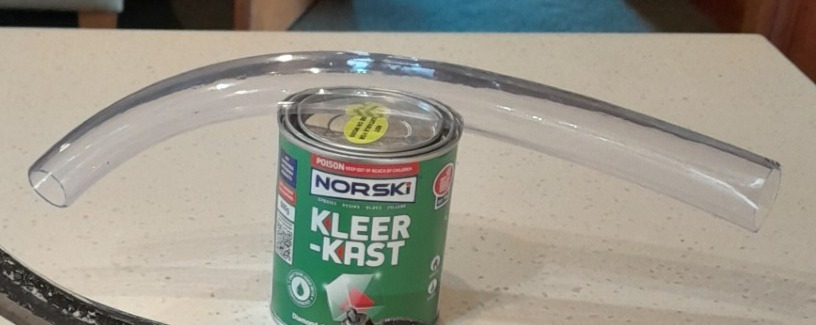
The metal arm of the stand is non-magnetic. I think it is silicon or some other metalloid. I contacted a welder to ask whether it could be welded together. He was very doubtful. I considered various sorts of glues, braces, splints, etc. Ultimately, I decided to buy some clear flexible vinyl pipe (one-inch internal diameter) and 500ml of Norski "Kleer-Kast" clear resin, from the hardware store. This is a polyester resin, not an epoxy resin. (Tips for working with Norski Kleer-Kast resin.) This resin is made specifically for encasing objects, and it does not stick to PVC or vinyl. My goal was to use the pipe as a mold/mould to encase the broken arm. The image below shows a piece of the pipe left over after the job, and the resin. The photo does not show the little bottle of catalyst that you mix with the resin, to trigger curing/hardening.
Before doing any work on the globe, I encased another small object (a small plastic gummy bear) in a short piece of the same pipe, to test whether the resin would stick to the pipe, how long it took to harden, and whether I could sand it to a glass-smooth surface; the practice piece was very useful as a learning tool. This particular type of resin shrinks slightly when it cures, and it pulled away from the pipe a fraction of millimetre after hardening. This shrinkage made it easier to remove the resin from the mold/mould simply by pushing it out, but a different approach to pushing it out was needed for the globe.
The vinyl pipe was very stiff. So, I filled the vinyl pipe with boiling water and I shaped it into the correct diameter circle. Then I emptied out the boiling water, and left the hot pipe wrapped around a paint can that was of the diameter implied by the broken arm. After the pipe had cooled, I cut the pipe to the length needed to envelop the full length of the broken arm. I slit the pipe down one side and taped it back up with plastic packing tape (so that I would be able to peel the tape off and open the pipe up once the resin cured).
I pushed the pipe onto the bottom part of the broken arm and stoppered the bottom end using PVC electrical tape. I poured in a small quantity of resin and left it for 40 minutes to cure. I did this outside with a good breeze. You should be sure to also wear gloves and a very good breathing mask if you do this, because resin is dangerous stuff! Do not use it indoors under any circumstances.
Note that the comes as a slightly viscous liquid in a can, and with a small bottle of catalyst hardening agent. The more catalyst you add to the mixture, the faster your resin cures and the hotter is gets during the curing process. A fast hot cure can damage the surface of the resin. The less catalyst you add, however, the slower and cooler the curing process. So, I chose to use the least catalyst I could (1.5%), given the range given in the instructions (1.5%--2.0%), and it worked very well, though it took a little longer to cure than if I had used more catalyst.
Then I pushed the top end of the broken arm into the pipe and poured some more resin in. I had to position the broken arm very carefully, so that the break lined up nicely and the arm was straight. I ended up holding it for 40 minutes as it cured. Then I topped up the pipe with resin. The successive pours looked slightly different colours until they all cured to crystal clarity. I ended up using about 200ml of resin.
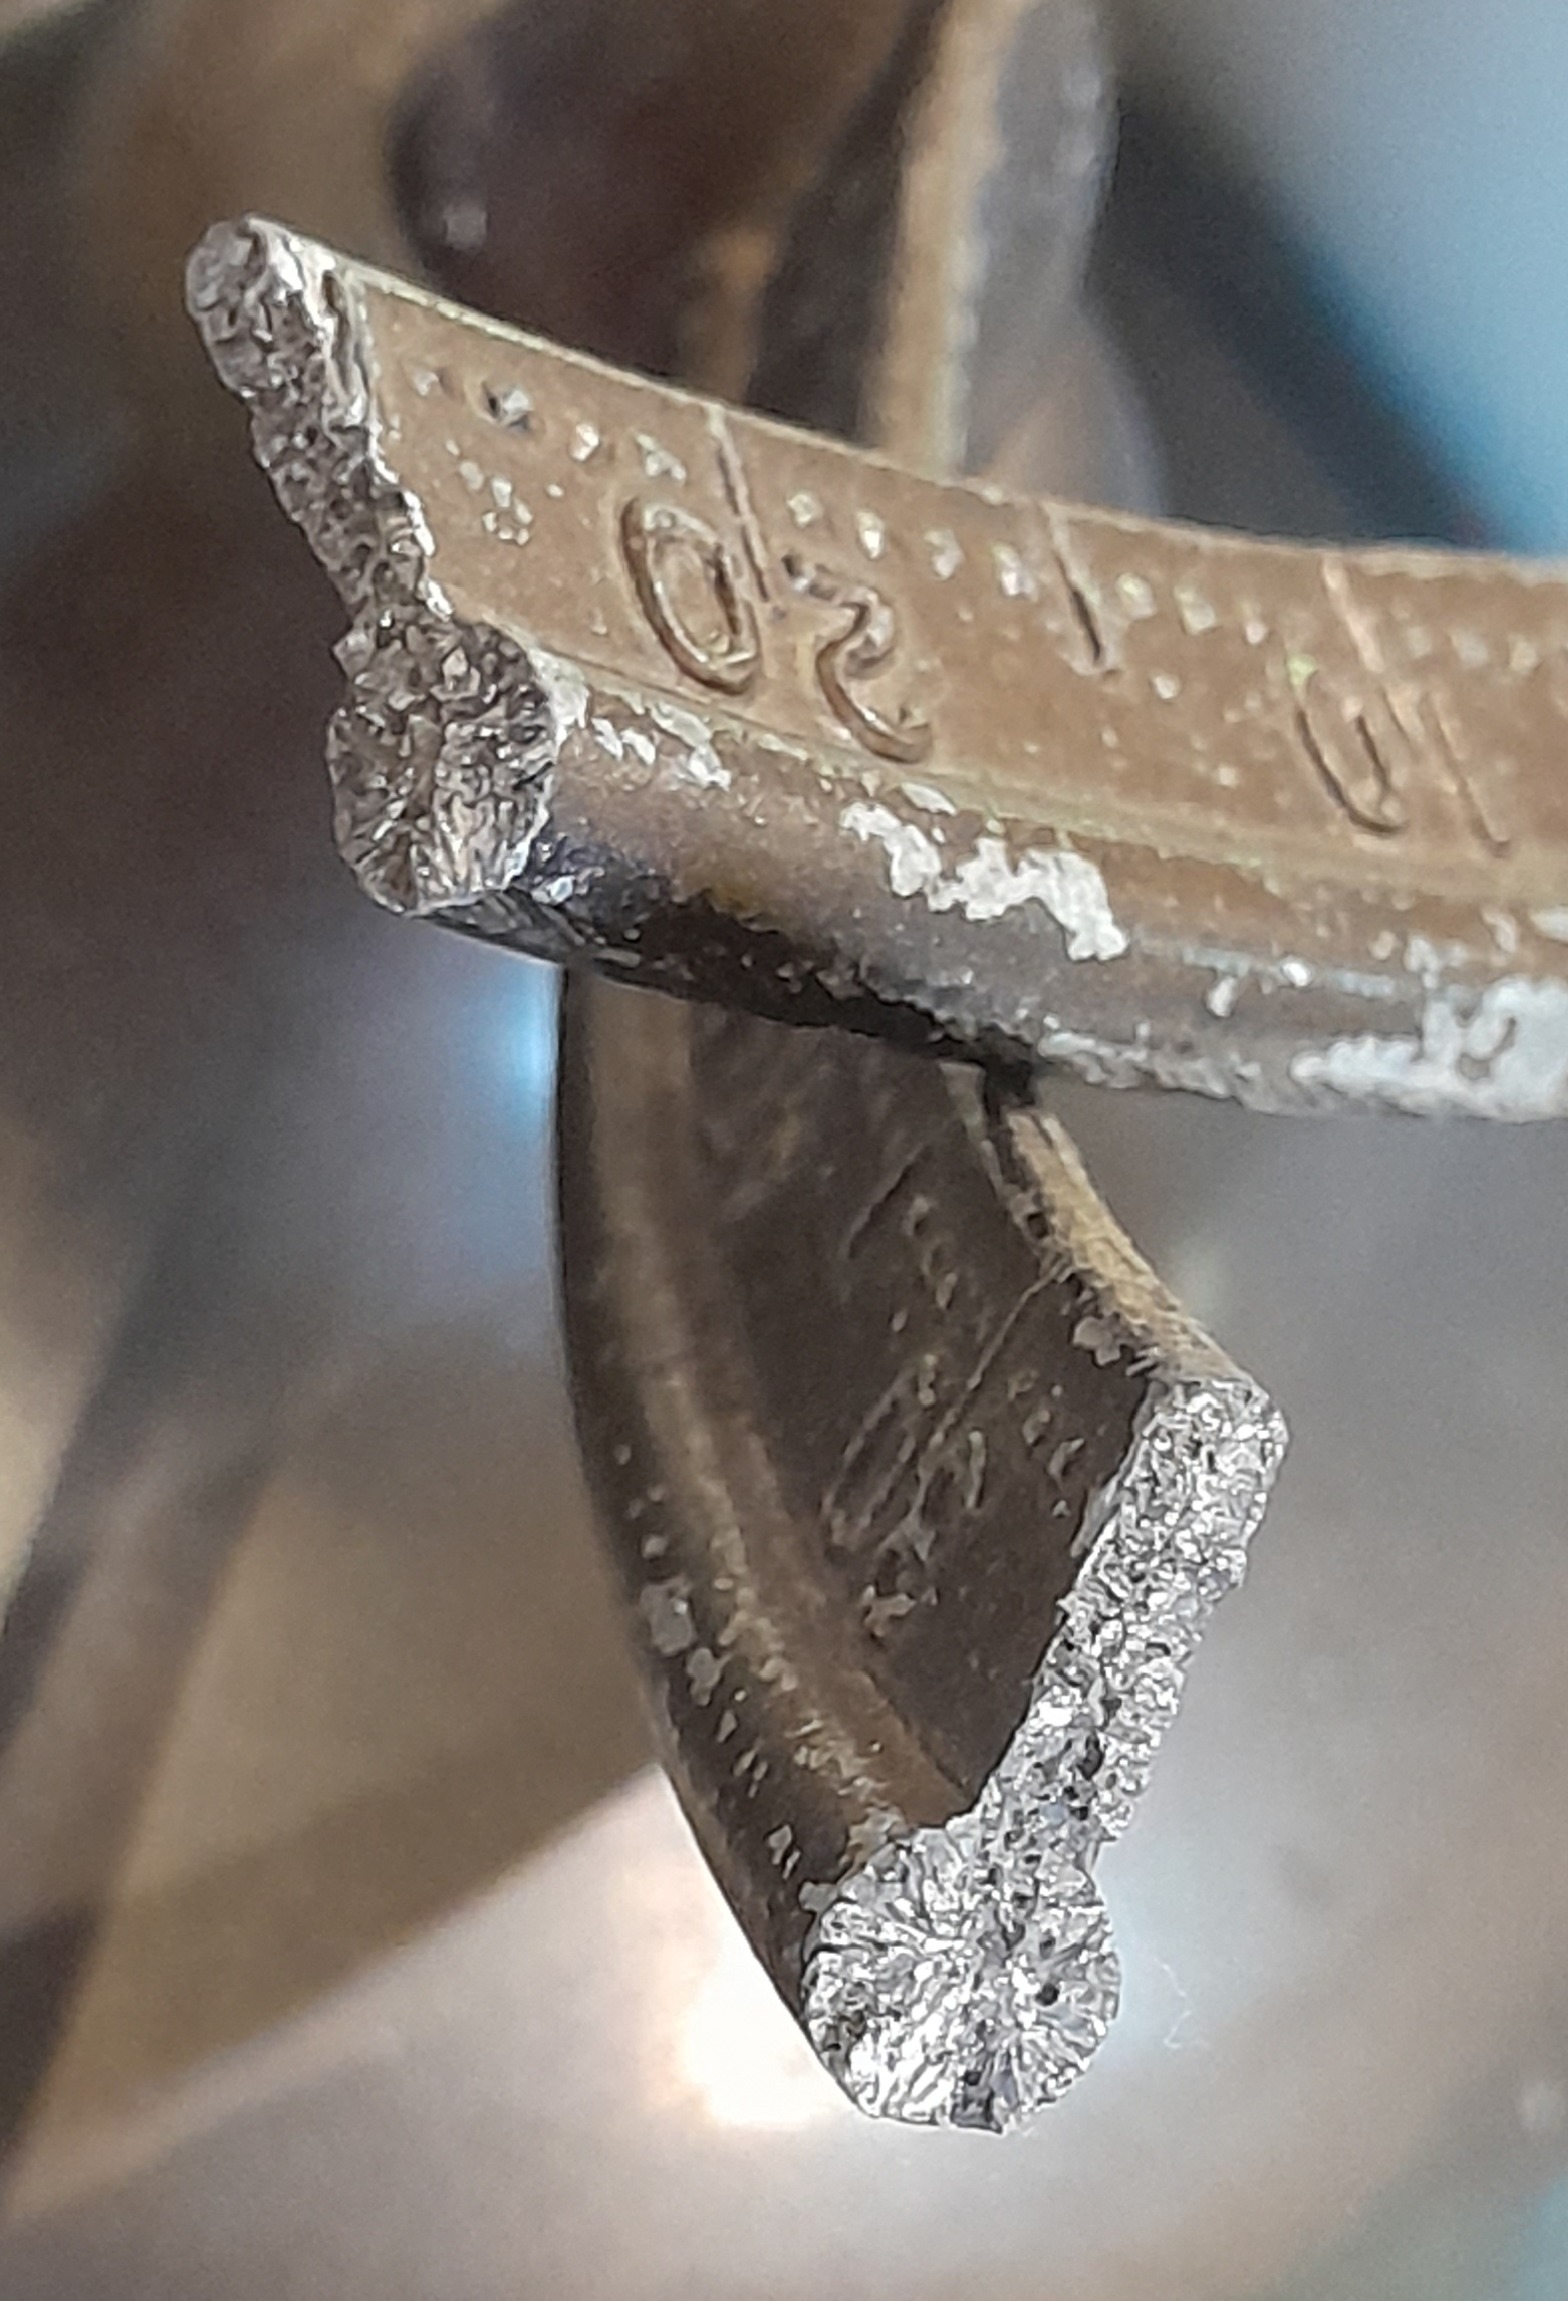
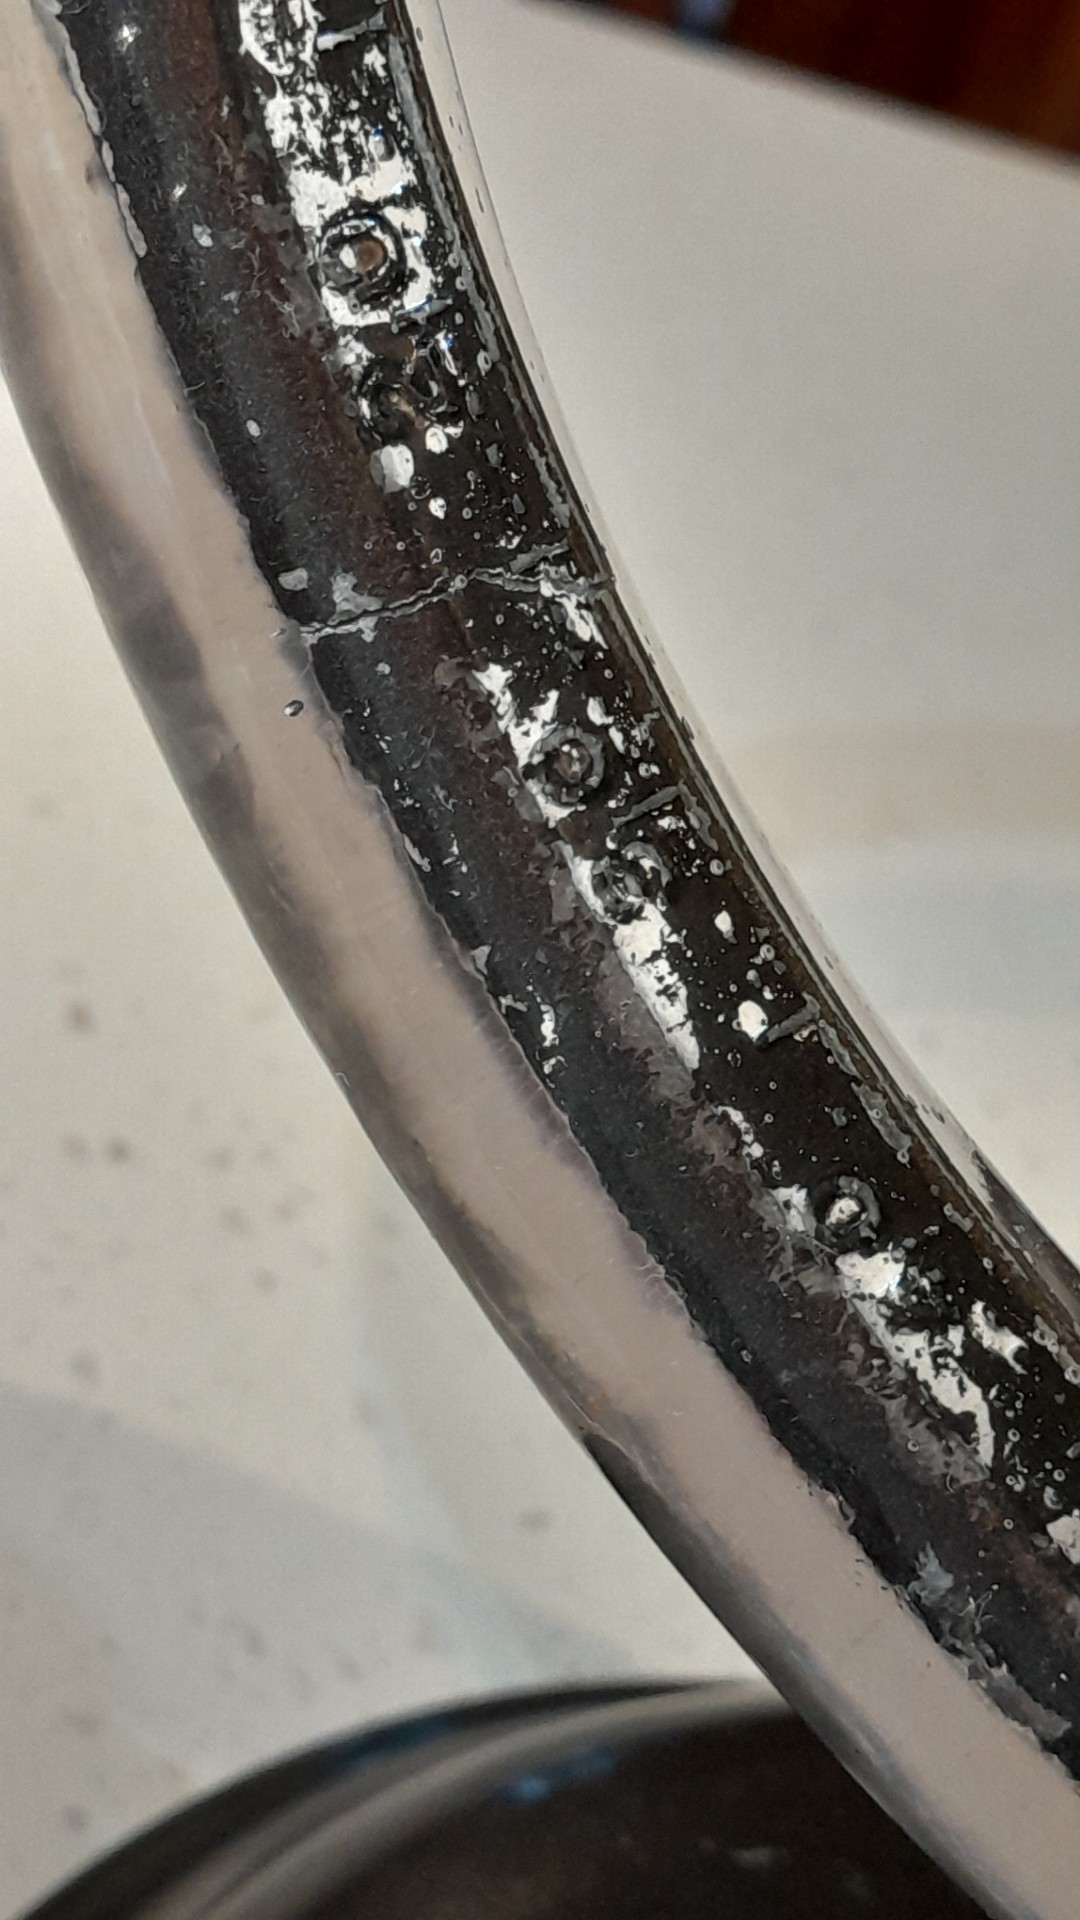
After two days, I removed the packing tape and opened up and removed the vinyl pipe. Then I left it for one week to cure fully. It cured outside in a garden shed, because the fumes are deadly toxic. Then I sanded it lightly to remove a seam created where the vinyl pipe had been slit. I used rough sandpaper, then very fine sandpaper, then Jif abrasive scouring liquid, and finally some metal polish. It ended up as clear and smooth as glass. I wore a good mask when sanding, because the dust is likely toxic. In the first image below, you can see the seam that I subsequently sanded off.
You can see the encased breakage point here:
I considered repainting the entire item before encasing the arm in resin, but I don't think a 90-year-old metal globe stand should look new. So, I left the worn paint as it was.
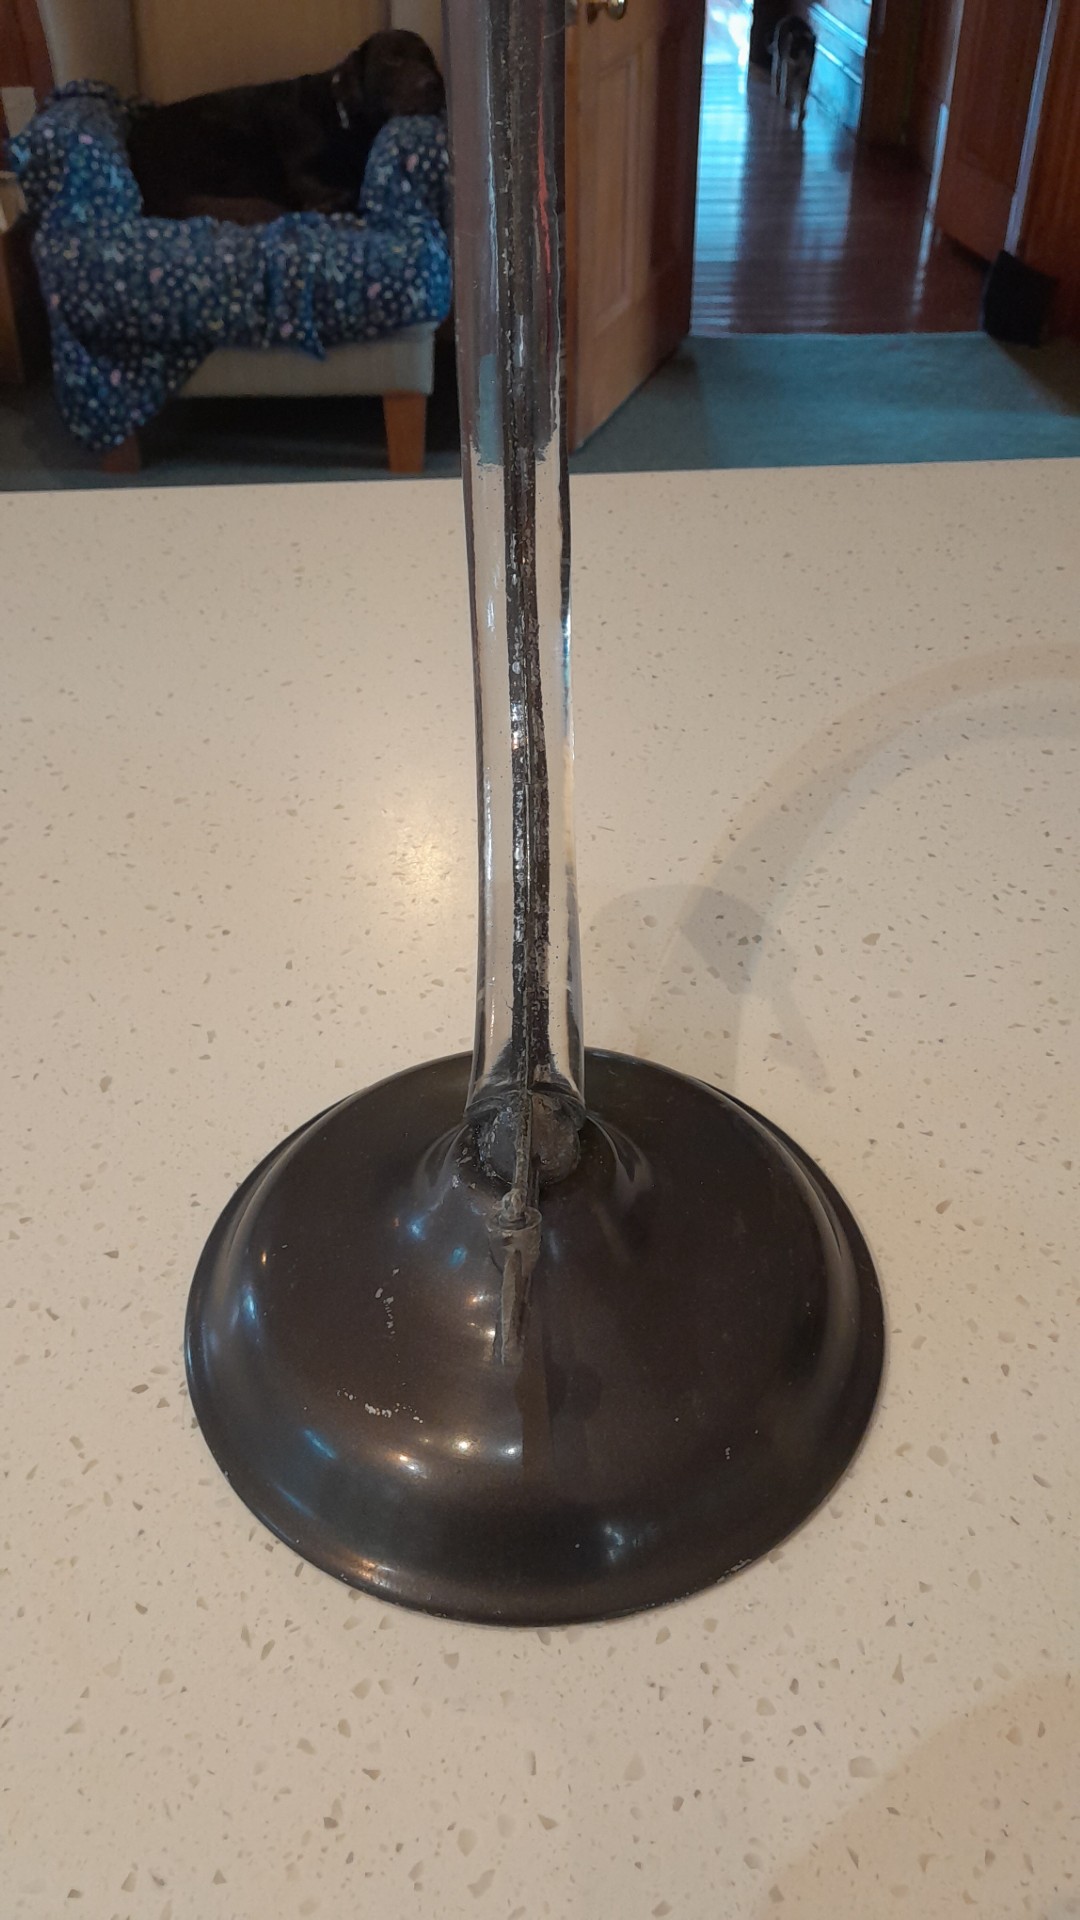
I refitted the metal end caps to the globe. Everything worked almost perfectly, but I made an extra little metal washer out of curved brass-coated steel (about 8mm in diameter) and joined it to the northern end cap using Araldite epoxy glue, because the distance between the axial pins seemed to be just about 1mm wider than I needed for a secure fit. The brass-coated washer now looks like it is part of the original end cap. See the original end caps and the new washer below. The northern end cap is also called a "time dial" because it allows viewers to calculate the difference in time between the different time zones on the globe.
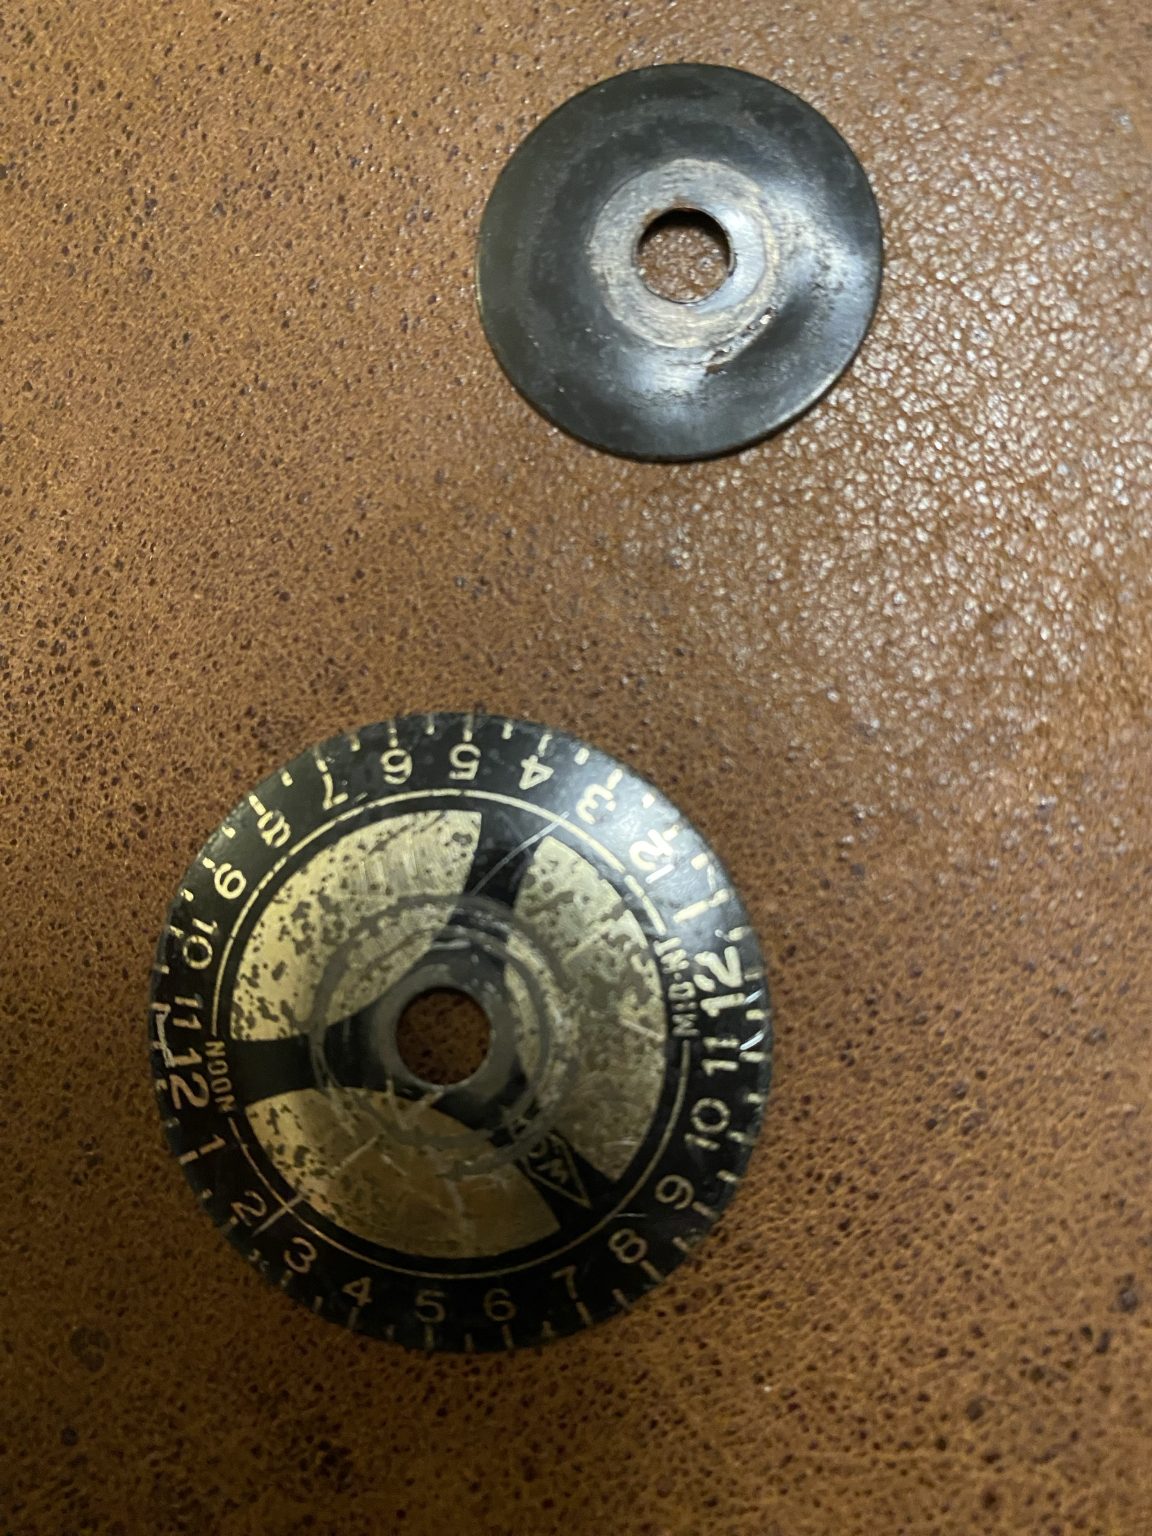
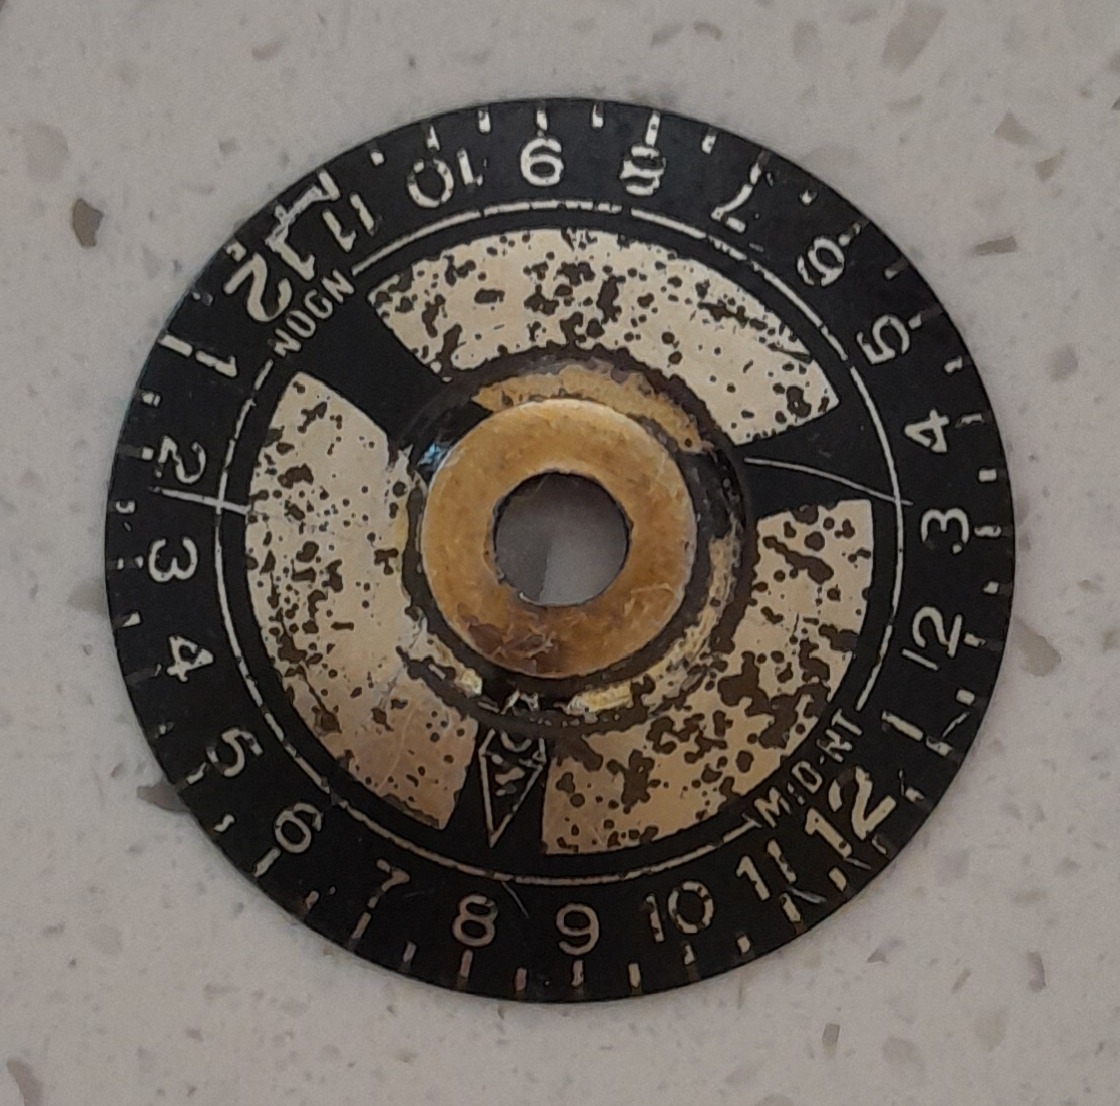
I also drilled out the middle of the top of the head of a small brass screw and affixed it into the hole at the top of the globe using Araldite epoxy glue. The screw's head is too wide to go through the hole. The screw is not visible when assembled. The reason I added this screw is that the existing hole in the top of the globe is too big for the tip of the upper axial pin. So, the axial pin was knocking around a little, and moving the northern end cap (i.e., time dial) with it. I could see old scored damage in the surface of the globe caused by years of movement. With the axial pin fitting into the drilled notch in the brass screw, however, everything is very snug and moves well, without any lateral end cap movement. Also, the screw head pushes the time dial end cap out a quarter of a millimetre, reducing friction of the end cap on the surface of the globe.
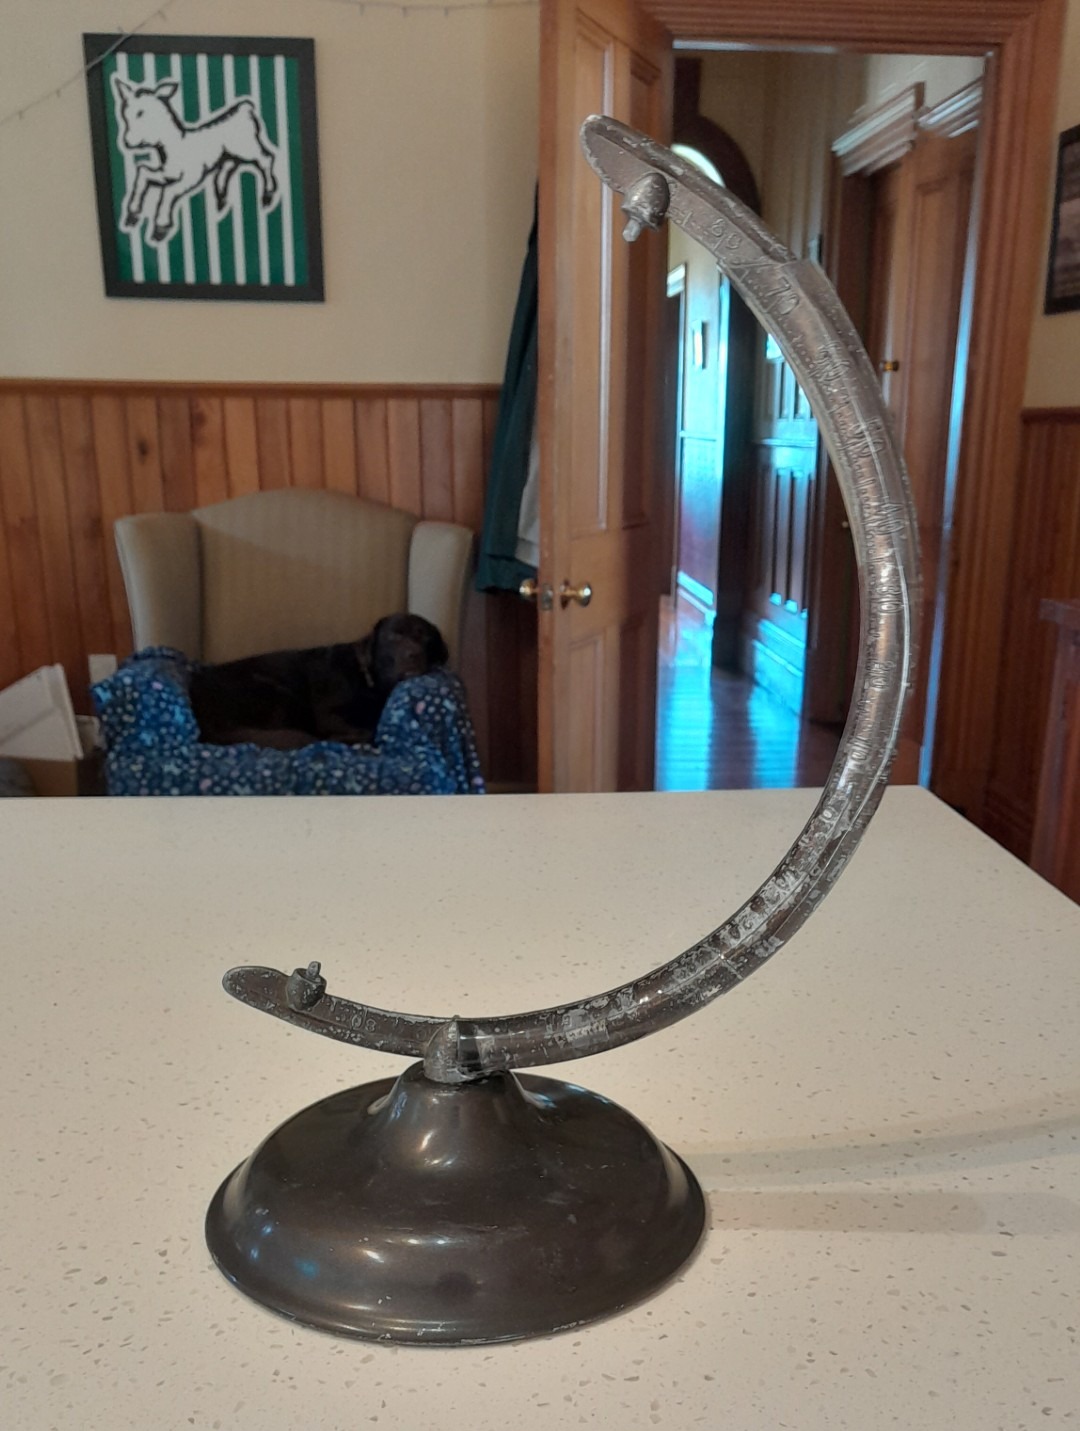
Here is the finished product. There is a 3-5mm gap between the resin and the globe. It spins nicely on its axis, and the resin-encased broken arm feels very strong. I plan to keep the globe out of direct sunlight, both to protect the surface of the printed globe, and to reduce possible yellowing/weakening of the resin that happens upon long-term exposure to UV light.
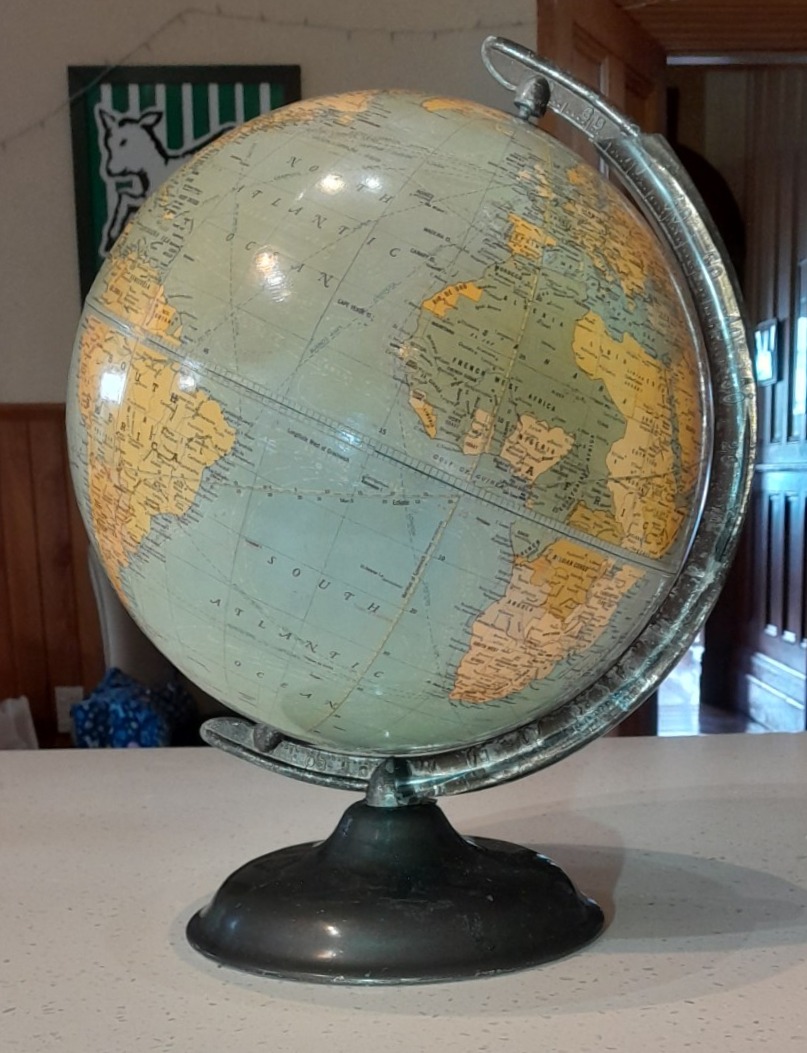
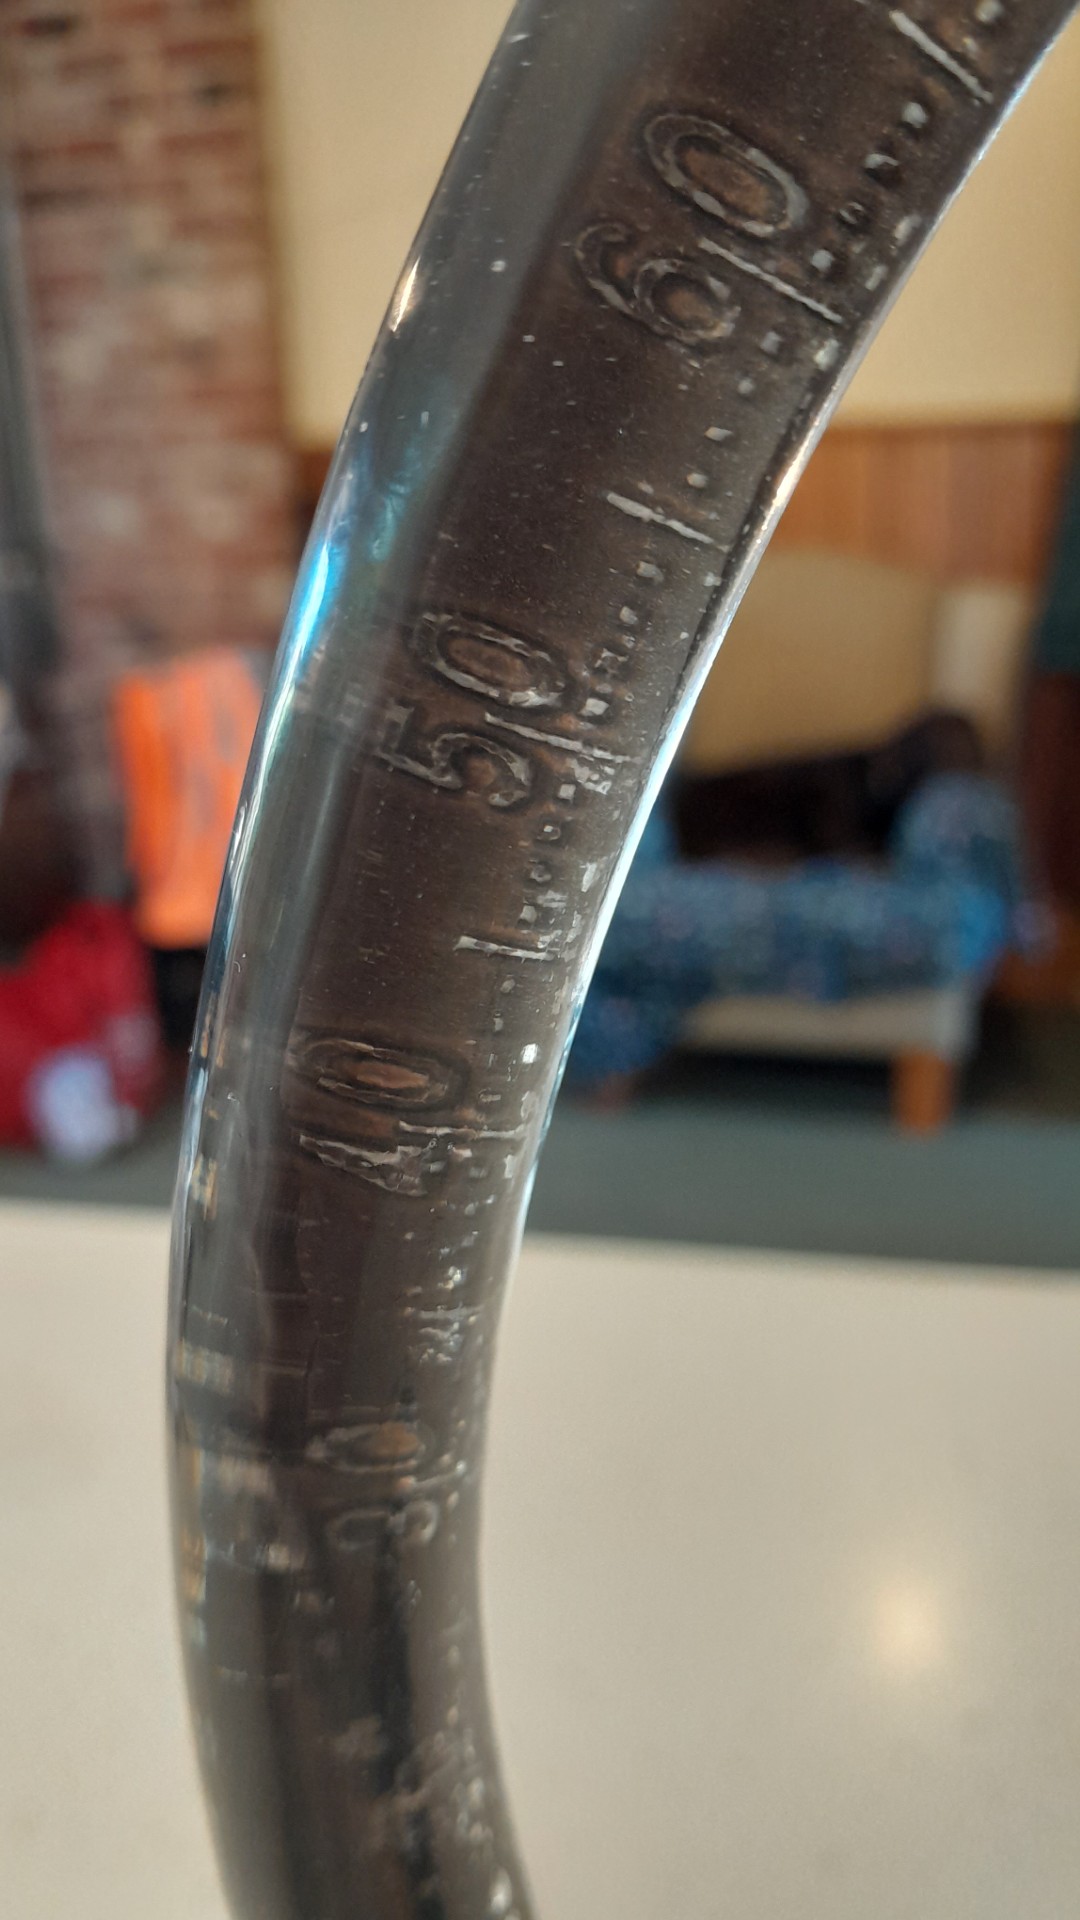
The polyester resin arm has lovely magnification effects on the numbers for the lines of latitude, making them easier to read. As soon as I had done my gummy bear test, I figured that this magnification effect would be an outcome, but it was a surprise to me before that:
Build Timeline:
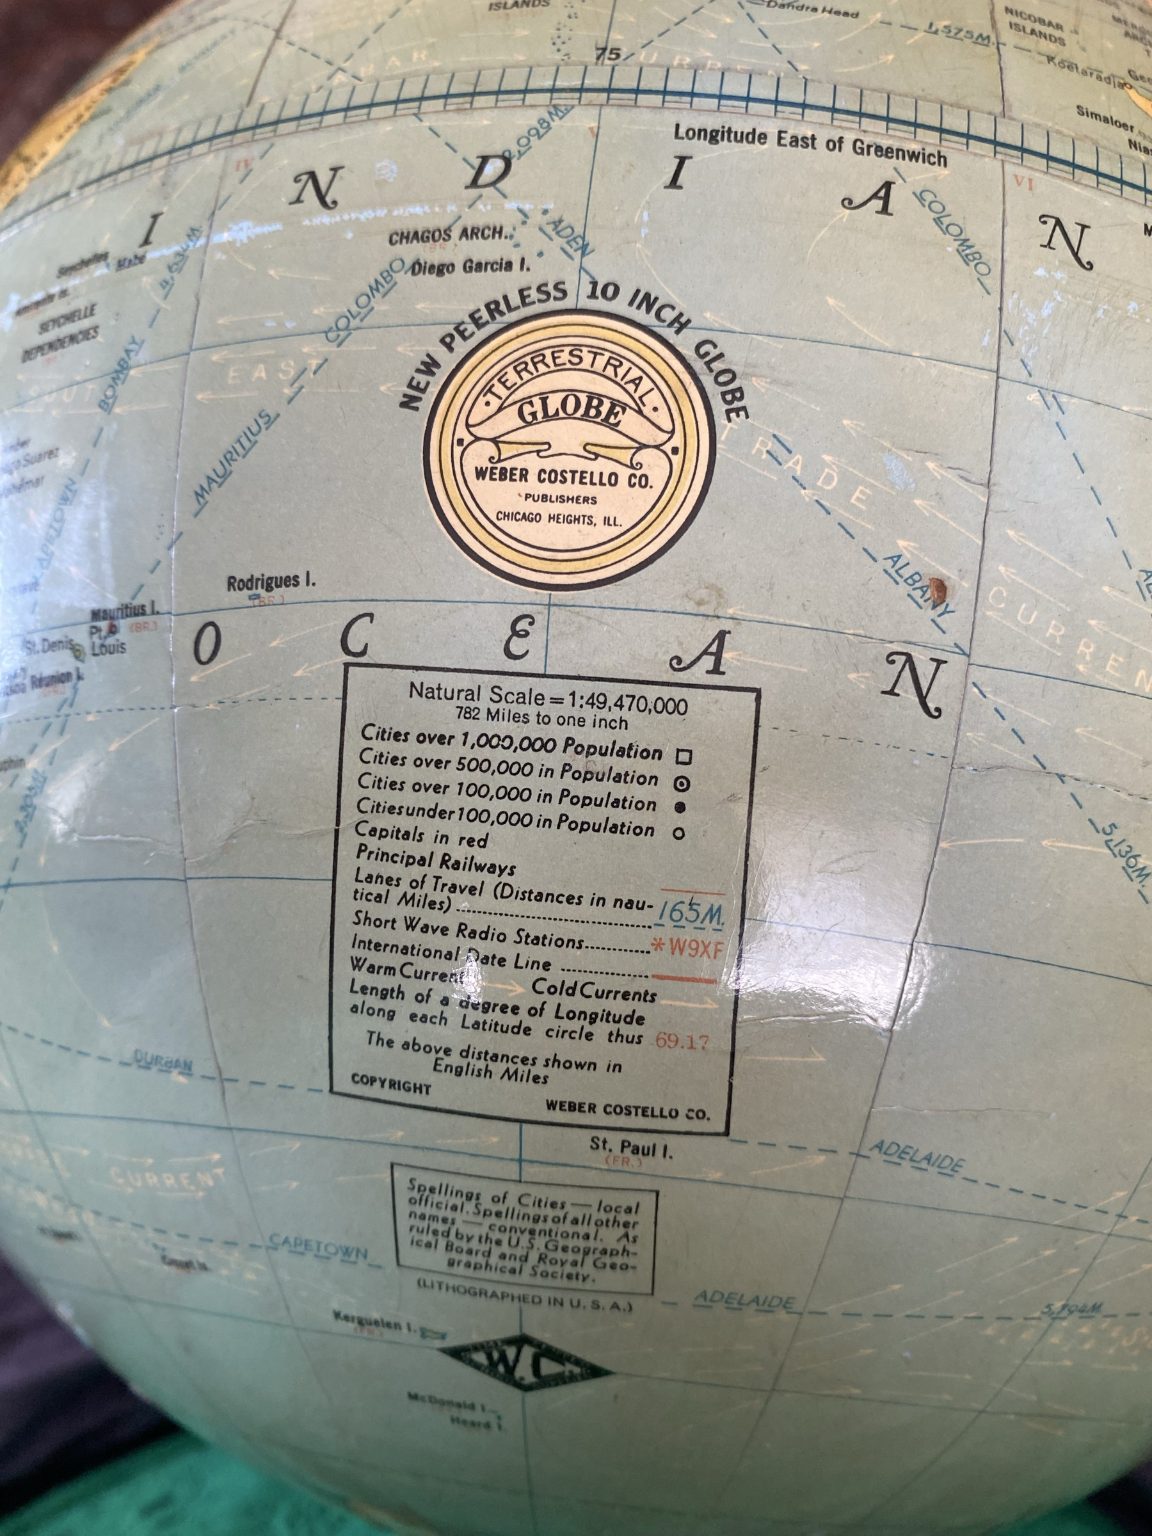
Finally, what is the date of the map design? (Of course, the globe itself could be a year or two later.) Under the base is a handle for tightening the connection between the base and the arm; it says "ECONOMY" on one side and "PAT JUNE 9, 1925" on the other. I see the following: Siam (up to 1939, and 1945--1947), Trans Jordan (1921--1946), the Irish Free State (1922 onwards), Leningrad (1924 onwards), Persia (up to 1937), Brazil (1930 onwards), Peiping (1927--1949) (now Beijing), Yugoslavia (1929--1943), Istanbul (1930 onwards), Saudi Arabia (1932 onwards), and Samara (1935 or earlier). These dates pin the map design down to the range 1932--1935. On this globe, the location of the South Magnetic Pole is still on the Antarctic Continent, but it looks like it is at the first-discover 1909 location, at roughly 72.25°S 155.15°E (or a little further E to my eye). The South Magnetic Pole was located again in 1931, but that information does not appear to be updated on this globe. So, I suspect that this globe dates to the early end of the 1932--1935 range of dates, perhaps 1932/33, before the new 1931 Pole location was widely known.